In these past few quarantine months, technology and virtual tools have become a vital part of every business’s workflows. Whether it be the weekly Zoom calls with your team or even the shared folders in your Google Drive accounts, this period of remote work was able to give virtual tools the opportunity to support and prove its value while we’re all working remotely. However, one type of virtual solution has been gaining more traction and attention due to our current circumstances are virtual/3D showrooms.
While it was necessary, the unprecedented order from all local governments across North America to close all non-essential businesses was the beginning of a few very difficult months for so many professionals. From real estate to commercial furniture, there are numerous industries that heavily rely on physical showrooms to showcase their products and to vision cast what a space will look like. Although there are certain states that are steadily heading into their “Phase 1” of their reopening plan, it’s safe to say it will be a while when showrooms are able to reopen. Not to mention the changes needed to be made in order to make spaces COVID-19 compliant.
As a response to our current circumstances, many design and sales professionals have started to explore new virtual solutions that allow them to continue operating regardless of location. However, where do you start with creating a 3D showroom, let alone a fantastic virtual experience ready for your next presentation?
Here are the 3 simple steps you will need to take in order to create a stunning 3D showroom experience for your clients.
Step 1: Design
When it comes to creating your 3D showroom, there are generally 2 methods for content creation: using a 3D modelling/CAD program or 360-degree photography. We have previously done a deep-dive into the two methods for creating VR content, however with our current situation, 3D modelling/CAD programs may allow for greater flexibility than 360-degree photography. So let’s explore how you can create content for your 3D showrooms.
3D Modelling/CAD Programs
Interior designers and architects are probably the most well versed in using 3D modelling and CAD softwares, and it’s very simple to create content for your 3D showroom with these platforms. All you need is an extension or plugin that will be able to convert your design into a cubemap.

For those who aren’t familiar with cubemaps, this type of image refers to a series of six images duplicated per eye (a total of 12 images) that form the faces of a cube. Each face represents the view along the directions of the world axes. And what you get in the end is a JPEG image that you can upload to a VR viewer. However, before you convert your 3D model into VR content, make sure you have the basic layout of a space: 4 walls, a ceiling, and a floor. It’s also important to select the desired camera angles in your design.
There are a few CAD programs that are able to produce cubemaps with their software, however software like SketchUp or Rhino do not have this feature. The good news is that there’s an extensive library of plugins (that are most often free) to choose from that can help you create content for your 3D showroom. With our Yulio VR platform, we have created free plugins for SketchUp, CET Designer, Rhino, and 3DS Max. All it takes are a few extra clicks to create an amazing and immersive VR experience.
Step 2: Enhance
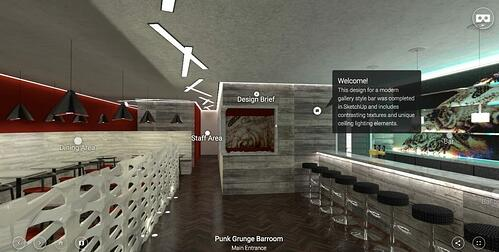
Now that you have laid your foundation and have your VR compatible content ready, it’s now time to rearrange your scenes and enhance them for an even greater VR presentation. We’ve created on our Yulio VR viewing platform a selection of enhancement tools that can allow you to provide more information or to set your scenes just right to really “wow” viewers visiting your 3D showroom.
3 features I would recommend including in your 3D showroom are:
Text Hotspots
Text hotspots are great for adding more information on the product, its dimensions, and perhaps the fabric and finishes that are available. Or for interior designers and architects, text hotspots are fantastic for sharing the space’s specifications and perhaps your vision for the space.
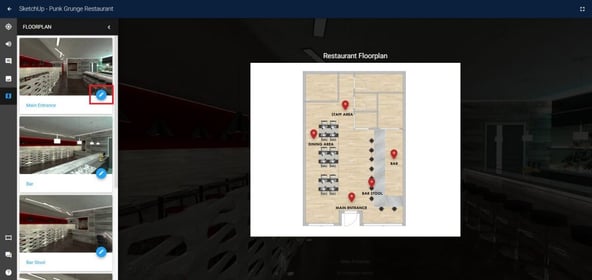
Floorplan Navigation
Depending on the size of your 3D showroom, it’s easy to get lost in a showroom just using navigational hotspots. Floorplan navigation allows your clients to not only have more context of your showroom, but it can help your clients better orient themselves in your virtual space. Plus, clients can quickly zip from one side of the room to the opposite without needing to click through multiple hotspots.
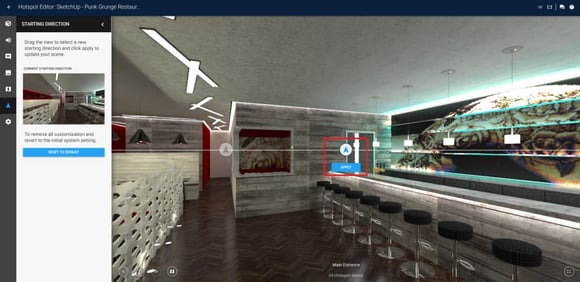
Default Starting View
While this is a feature most people overlook, setting your default starting view is really important. This gives you the opportunity to capture the “money shot” of your scene. Rather than have your client’s first look in your 3D showroom be a random corner of your scene, with our Default Starting View, you can have greater control on how your scenes are introduced.
Step 3: Share
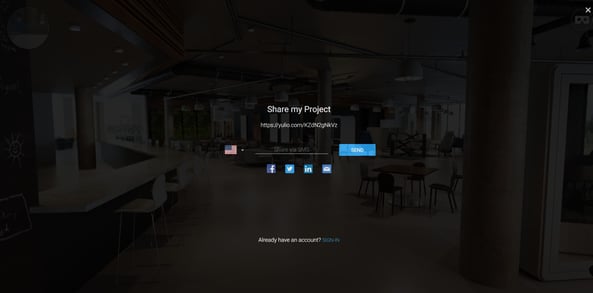
After you have finished uploading your scenes and enhancing your 3D showroom, it’s time to share your experience. If you were using our Yulio VR platform, sharing is really simple. We generate a unique URL link for every project you create, making it easy for you to copy and paste into emails for prospects or for clients. Plus, if you’re looking to share your project on your social media channels, all you have to do is click on the platform you’d like to share your 3D showroom on. Along with emails, social media is a fantastic way to attract and engage with prospects. Plus, it allows you to tap into a wider global audience, expanding your range of outreach.
However, if you would like to host a session that allows you to take your clients through your 3D showroom, we have the perfect tool for that. Collaborate is Yulio’s most used feature, giving our users the ability to collaborate and present their virtual spaces to their clients anytime, anywhere. Not only can you take control and highlight areas of your immersive experience or spotlight a specific product, but arguably the most powerful aspect of Collaborate is the ability to see exactly what your clients are seeing. Collaborate is a fantastic platform to engage with your clients and share your brand new 3D showroom experience.

It’s Simple, Quick and Easy Creating your 3D Showroom
The beauty of creating virtual showrooms is that you most likely already have the tools to get started in producing your immersive experiences. And while your 3D showroom is able to provide a line of support while you and your clients are working remotely, this type of technology can still be utilised when we are able to head back to the physical office. So don’t delay and wait a week or two to think about whether this technology is the right fit for you. With just a few extra clicks, start today and see how truly simple, quick, and easy it is to create a sensational 3D showroom experience.
To quickly create cubemaps ready for VR viewing, click here to see our full line of free Yulio CAD plugins. If you would like to start building your 3D showroom and to see in full VR, click here to sign up for our free 30-day free trial.