As part of our ongoing commitment to be the best VR presentation tool for business, we’re pleased to announce our latest feature addition to our Enterprise plan - Scene Options.
We’re always looking for ways to improve Yulio and respond to the ways our clients use VR tools in their business. One use case many of our clients are faced with is showcasing different variations and alternatives to a space or product. And while Image Hotspots do a great job in telling your story in the context of the VR scene, creating a hotspot for each design variation can quickly overcrowd your project. This is why we created Scene Options that allow you to share your story seamlessly. Not only do they enhance your overall design, but allow you to share your story while remaining immersed in VR, and not flipping to catalogs and 2D renders.
Use Cases
- When showcasing a line of products, use Scene Options to show various color, shape, or material options
- Change up the configurations within the scene to highlight the space’s potential and versatility
- Following your client’s feedback, upload before and after shots of the space to see whether they like the changes or would like to take a different approach
How Do Scene Options Work?
First, you will need to have at least two renders (scenes) of the same space from the same camera angle or perspective. We recommend adjusting colors, materials, textures or configurations within the scene to show off your space with many different options.
You will need to start off by creating a new VR project or by selecting the VR project you would like to add Scene Options to. For more information on how to create a VR project, click here.
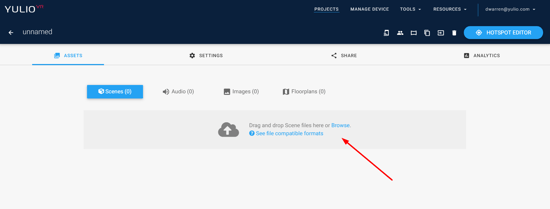
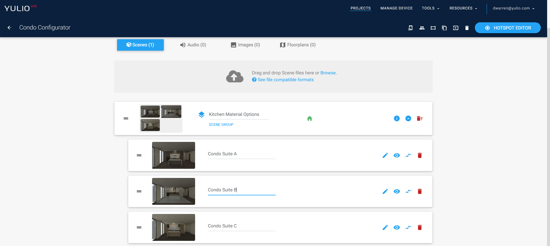
Upload your scenes to your VR project. You can either drag and drop your files into the upload box or hit "Browse" to select the scenes you would like to upload.
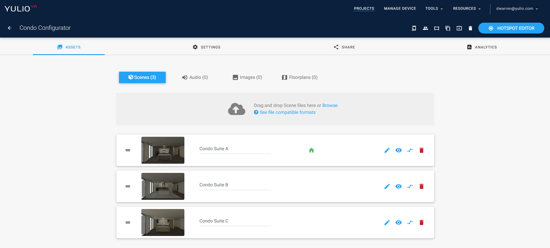
Once processed, your scenes will show up here. On this page you can add, delete, preview, rename, rearrange and swap your scenes.
You can repeat this process anytime to add any additional scenes.
To create a Scene Group, drag and drop the scenes on to of each other. To do so, click on the 
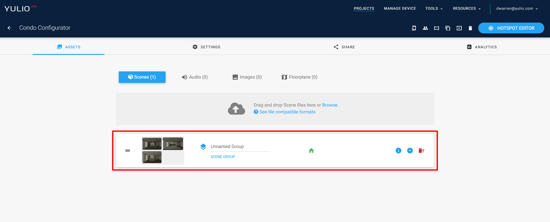
This will create a "Scene Option Group."
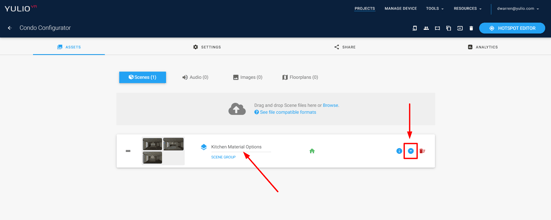
Next, click on the Group Name to rename your Scene Option Group and the down arrow icon to see all the scenes currently in that group. You can have multiple Scene Option Groups in one VR project.
From here, you can rearrange the order of the scenes in your group and rename each scene name.
The scene at the top of your list will be your "opening" scene for the Scene Option Group.
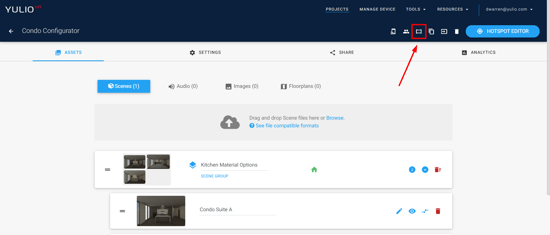
Now that you have created your Scene Option Group, it is time to view your project in VR. Click on the "View in 360" icon to open your project in browser mode.
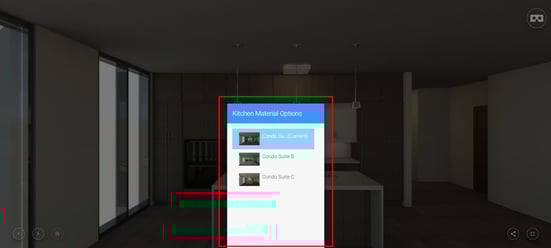
While viewing your VR project in browser mode, access your Scene Options by clicking on the tab in the middle bottom of your screen.
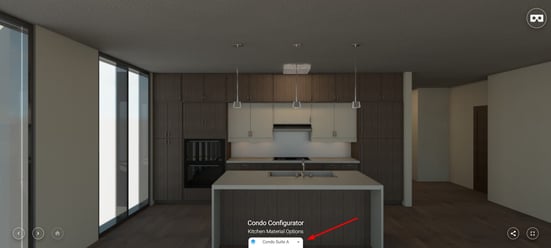
From there, select the Scene Option that you would like to view.
Our newest Yulio feature is now available in our Enterprise plan. To learn about all of our features and how to start using them, visit our Knowledge Base. For all inquiries on our features or for training, please reach us at hello@yulio.com - we would be more than happy to assist you.