Cloud-based rendering platforms are a game-changer for so many in architecture, interior design, and the commercial design industry. For design professionals, cloud rendering offers to render their project in just a matter of minutes without occupying their computer for hours on end. And for designers where rendering can take anywhere from half a day to two full business days, being able to receive their finished project in just a matter of minutes allows them to have greater flexibility with their time.
Creating Yulio Jump platform, our cloud rendering tool, was of great importance at Yulio since we saw a recurring pain point that affected all commercial design professionals. Rendering is a necessary step in any design workflow, and until the technology was able to catch up to produce tools like cloud rendering, designers had to become very familiar with waiting for their projects to finish processing.
But now, the wait is over.
Cloud-based rendering is one of the ways you can create VR-ready content and is an efficient alternative where designers could render multi-scene projects in minutes, just like this project our team created and specified in SketchUp.
Previously, we had compiled our top 10 tips for rendering with Yulio Jump. However, we wanted to share some specific tips, tricks, and considerations for our design users who are using Yulio Jump for SketchUp looking for ways to further enhance their projects.
So let’s get started!
1. Add In 4 Walls and Ceiling
Before we get into the Yulio Jump for SketchUp-specific tips, we need to set the foundation and cover some of the basics.
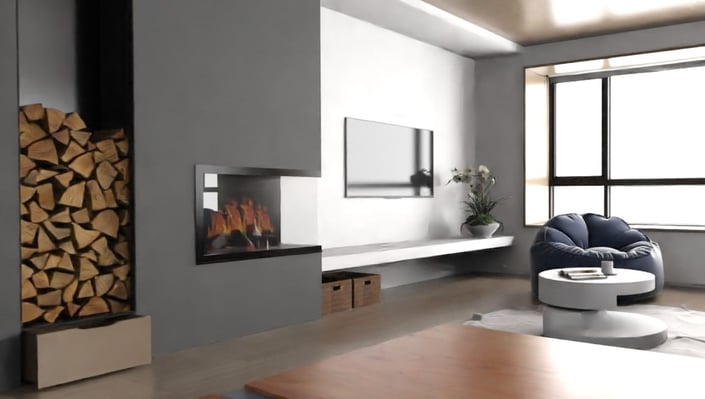
When rendering with Jump, it’s always important to prepare your scenes properly before rendering. To get the best results, we recommend rendering projects that have 4 walls and a ceiling. We like to share this tip with all Jump users as rendering enclosed interiors makes the experience much more realistic and immersive, creating a better experience for your clients.
Yulio Jump was built with an algorithm where light is able to reflect and produce more realistic shading and shadows with these structures present, so this is definitely one step you cannot miss. Plus, you must always remember that when designing for VR experiences, you need to take into consideration and think about what it will be like inside your 360-degree immersive environment.
2. Select Camera Height Settings
Another best practice that all Jump users must know is to set the camera angle height to 5’6” or roughly 165-170cm, which is the average height in North America. Like we just covered, when it comes to designing for VR, you need to take a few more areas into consideration. Entering projects where the starting camera angle is way too tall or short can completely shatter the realism you’re trying to achieve with your project. And when it comes to using VR to tell your design story, you need to keep in mind the end-user and how they will experience your project.
However, you can also play around with this feature and use the camera height settings to tell your story better. For example, if you’re redesigning an office space, you can showcase a different perspective by adjusting the camera angle to simulate what the space would be like sitting in an office chair. Making the most out of the flexibility in camera angle settings and matching a more realistic gaze will help your projects get closer to feeling like a lived experience.
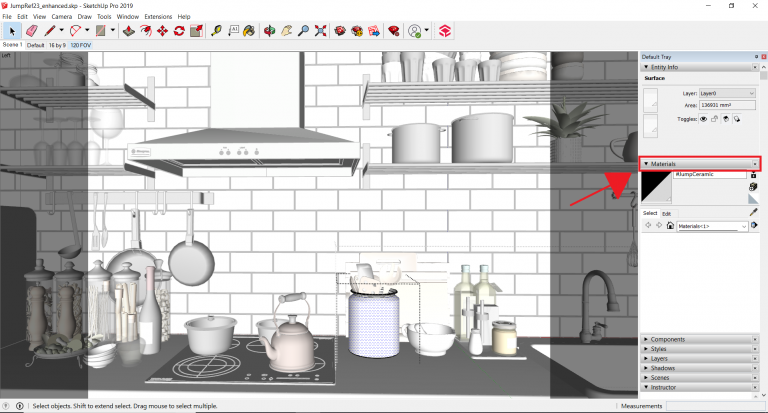
3. Utilize our Enhanced Material Tags
For Yulio Jump for SketchUp users, we have a list of 17 Enhanced Material Tags you can use to take your projects to the next level. Our team has created these tags which you can copy and paste into SketchUp’s material label field to give more depth and realism to your project.
4. Using CAD Plugins with Mac
While our free CAD plugins only support Windows operating systems, we have a minor workflow modification that architects and designers can use to get started today.
All you need is to download a Windows virtualization software such as Parallels or VMWare Fusion to get started. These applications typically have a free trial you can use to get started, however virtualization platforms will be necessary to give you access to the Yulio CAD plugins on your existing Macintosh workstation. You can find the full step-by-step tutorial in this Knowledge Base article, however, one area we need to highlight is to double-check whether your 3D modelling/CAD software’s terms of service allow you to legally install the application on two separate operating systems. SketchUp has stated that this is allowed with their platform, but if you’re using a different platform, contact their support team if this is possible.
5. Enhance your Project Instantly
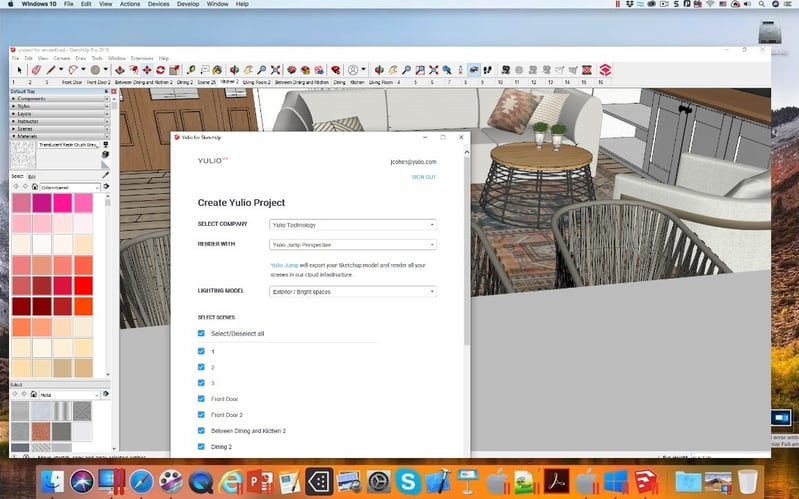
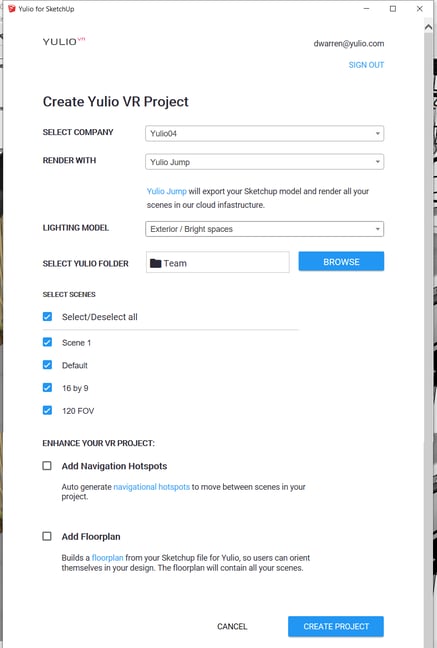
Don’t forget that with Yulio Jump, we have included settings for all users where you can enhance your VR projects instantly. After selecting your scenes and lighting models, you will see two options under “Enhance your VR Project”. With just a few clicks, you can:
- Add Floorplan: Yulio Jump will auto-generate a floorplan for you from your SketchUp model
- Add Navigation Hotspots: Yulio Jump will automatically generate navigational hotspots in your VR project
By selecting these two features before hitting render, you can shave off the time it would take to manually create your hotspots in Yulio. However, please note that while our features are relatively accurate, go into your project and check whether the placement is to your liking or switch out our generated floorplan to one that you have made. Our intention with these two features is to help you get started, so rearrange the hotspots to best suit your project.
6. Run Tests on Projects
And finally, remember to run tests on your projects! This is one tip that our content creation team swears by because while you can easily master navigating Yulio Jump, every project will behave differently in our rendering platform. So don’t be afraid to render as many tests, check the perspectives, try out the two different lighting models and play around with the angles until you’re able to capture your vision.
In order to keep things consistent, try running a couple of tests on a single scene first and then moving on to the other scenes in your project. This helps keep your project streamlined, consistent and clear, helping you make a stunning yet easy to understand presentation.
We hope that these specific Yulio Jump for SketchUp tips were helpful in further enhancing your projects! Our team at Yulio is always here to help, so please feel free to reach out to us anytime if you’re looking for more clarification or support. If you’re new to Yulio Jump and have yet to create your first VR design, click here for more guidance and a checklist on designing for VR.

.jpg?width=245&height=150&name=christina-wocintechchat-com-PzAd5XCyFJo-unsplash%20(1).jpg)
%20(1).jpg?width=245&height=150&name=BUSINESS%20READY%20VR%2084%20(3)%20(1).jpg)
.jpg?width=245&height=150&name=simon-abrams-k_T9Zj3SE8k-unsplash%20(1).jpg)