From commercial interiors to office furniture, CET Designer is currently one of the most used CAD platforms in the design industry. With its simple and intuitive platform, users can easily drag and drop elements into their projects and transform their 2D and 3D environments into intricate stunning spaces. CET’s long list of features provides a solution to the various pain points professionals face in their day-to-day processes. Whether you’re looking to pull up a quote to send to your clients or add-in installation drawings, CET is able to do all that and more.
Just a month ago, we posted an in-depth look into our Yulio plugin for SketchUp and the various file formats that are compatible with our platform. And in today’s post, we’ll be highlighting and taking a deeper look into our Yulio CET plugin that is free and available to download today.
From the beginning, our main mission at Yulio is to create and be the best immersive presentation tool for business. We have always understood that creating compatible content can be one of the biggest challenges for users hoping to utilize immersive technologies in their workflows. Which is why we have built a number of CAD plugins that are free to download and will turn your spaces into compatible files in just a few clicks. Our CAD plugins are the simplest and easiest way to generate all necessary source files ready to be uploaded to Yulio to view.
So let’s dive in and take a look at how you can use our Yulio CET plugin.
Using the Yulio VR CET Plugin
For the step-by-step tutorial on downloading and using the plugin, click here for the full user guide.
To get started, download the plugin from our CAD plugins page or from the Configura Marketplace.
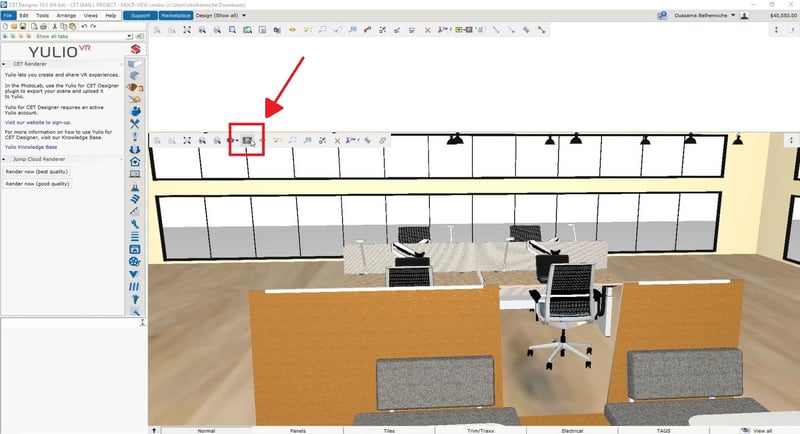
When it’s done downloading, it’s time to get your project prepped and ready to go. Make sure to include 4 walls and a ceiling within your drawing before heading to Photo Lab to set up your filters. Here are the parameters we recommend:
| Settings: | Select Option: |
| Render Mode | 360 with Natural Light |
| Render Quality |
Render Quality: High |
| 360 Panorama | Yulio 1536x1536 (13,5M) |
| View Mode | Normal |
| Camera |
Clipping: 0 |
| Light and Shadows | Multiple Suns |
| Background |
Predefined: Standard or Black (pick one) |
After outfitting your settings, click the New button and start zooming in or out to create your initial perspective.
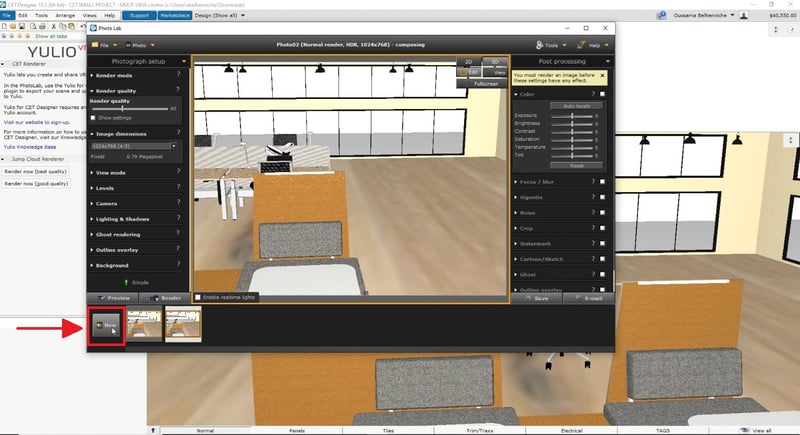
Top Tip: make sure you have not changed any of the camera settings you have previously configured. If they have changes, reassign the appropriate values again.
Hit the Render Now button and you have just rendered your first 360 panorama! After clicking the button, your project will be sent to CET’s Rendering Task queue. And if you’re looking to create more than one perspective, you can create multiple VR scenes by repeating the steps above as many times as necessary.
.png?width=344&name=New-Jump-Screenshot-344x550%20(1).png)
When your file is completed, it will appear within the PhotoLab window as a cubemap. And all you have to do is upload your panorama file directly to your Yulio account to view your project.
From there, you’ll need to authenticate the plugin within the CET Designer’s PhotoLab - here are the steps:
- Click the Export > Export to Yulio button
- Click the Upload button
- The selected 360 panorama cubemap file will automatically upload to your Yulio account
- Click the View in Yulio button to view
Rendering Options
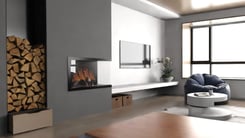
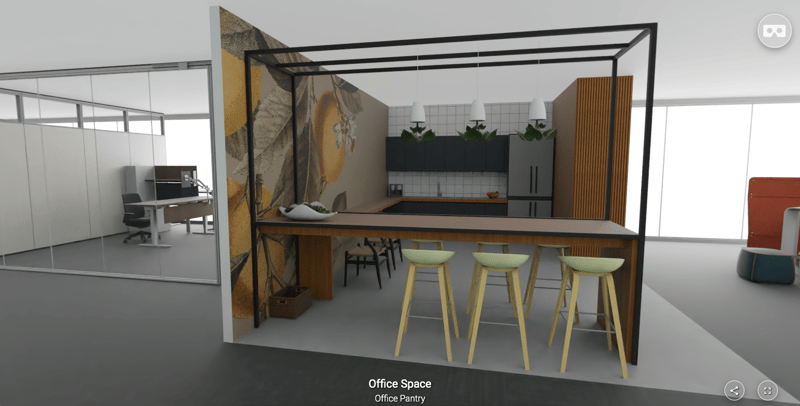
There are a number of methods you can render your scene for your VR project, one of them being our cloud rendering platform Yulio Jump. Here's a project our team rendered with Yulio Jump for CET to give you a better idea as to what you can achieve with cloud rendering.
Rendering with Yulio Jump for CET can further elevate and refine your projects. To render with Jump, exit PhotoLab, find the Yulio Extension in your Toolbar, and select Render Now. From there, the Yulio extension will pop up and provide a few options. Here’s what’s available for you to use and the considerations of each option.

Company: Select the company/Yulio account you would like the project to upload to. Most of the time you only have access to 1 company and it will be listed as the default for you.
Render With: Select Yulio Jump or Yulio Jump Perspective.
Lighting Models: Select Exterior/Bright Space or Interior/Shaded Space.
- Exterior/Bright Spaces - This lighting model relies on the sun to light the scene. If your scene is outdoors or has a lot of windows this model is the most accurate and will look the most realistic.
- Interior/Shaded Spaces - lighting model uses a special algorithm that combines sunlight with artificial ambient light. If your scene is fully enclosed or has only a few win dows, use this lighting model.
Home/Team: Select the folder within your Yulio account you would like the VR project to be created in.
Photos to Render: Select the views you would like to render that you set up in Photo Lab.
Add Floorplan: Automatically build a floorplan from your CET model so users can orient themselves in your design. The floorplan will contain all the scenes you decide to render.
Add Navigation Hotspots: Auto Generate navigational hotspots for your project so you can move scene to scene when viewing in Yulio.
We hope this was helpful in understanding the importance of our Yulio VR CET plugin and how you can get started. For full step-by-step tutorials on our plugin and our platform, head over to our Knowledge Base. If you have yet to get started with Yulio, click here to get started with our free 30-day trial - get access to our full line of enhancement features and see our platform in action.