VR technology is perhaps one of the most advanced and revolutionary visualization mediums that are currently available. The immersive experiences feel surreal, and it truly transports the user into a virtual space to be able to get up close and explore designs and configurations as they exist in real life. However, while Virtual Reality has no problem in getting people excited and interested in the technology, the biggest barrier to overcome in a user’s journey is how to get started with VR.
For years, many commercial design professionals have been interested in VR technology and its capabilities. But the perception that it’s time-consuming, complicated, and expensive to learn and set up is what leads them to think they may not be ready for it just yet.
Today we’re here to tell you that it’s the exact opposite.
Learning about the VR industry and getting started with VR solutions is a lot faster and more user-friendly than you may think. With our guidance and just 10 steps, you can build a sturdy and informed foundation that will help you get set up for VR success and become a VR champion in no time.
Step 1: Schedule time to sit down and learn about VR
It’s important to get insight and knowledge into the VR industry as well as the technology itself. Whether you choose to crash-course learn everything in just a day or a couple of hours here and there, setting aside dedicated time will give you the focus you need to concentrate on the details and allow you to learn a bit faster with a clearer mind. A good place to start is to understand what VR technology is, and its value in the commercial design industry, and to hear other industry leaders’ journeys in being early VR adopters.

Step 2: Take our “5-Day” VR email course
Our “5-day” email course was designed so that, even with a busy schedule, you can get started with virtual reality information you need to know, without the hassle of having to research every detail. This video series talks about getting you a simple and friction-free solution by going over topics such as why VR is business-ready and if it is suitable for your business, how to integrate VR into your existing workflows, tips for selecting the right technology and technology vendors (and yes, that doesn’t always mean that Yulio is the best option for you), and IT, training and budget considerations.
By the end of the course, you will have the tools and terminology to talk to other members of your firm about the benefits, costs, and practical considerations of bringing VR into your practice.
You can sign up for our email course here!
Step 3: Sign up for a free 30-day trial of Yulio!
The next step is getting started with a VR platform that will allow you to present and enhance your projects and signing up for Yulio is free and takes no time at all. Our free trial gives you full access to our whole line of features for 30 days, helping you see the possibilities for getting started with VR - you can use one of our sample scenes or create your own.
We find that the ‘ah-ha’ moment for VR learning is when people see their work in VR at the same time - it’s the difference between looking out a window and being in the park. After uploading your renderings or 360-degree photos, go on to edit and enhance your scenes with our line of hotspots, floorplan navigation, and Scene Options to name a few to give greater context and detail to your immersive presentations.
Click on the free trial option, and get started with Yulio’s free trial here!
We recommend that when you sign up, you go through our onboarding process. This process directly reflects what you will be doing in Yulio, and it will walk you through each page and function so you’re ready to go when it comes to your projects.
Step 4: Create VR-Ready Content
Now is the time to get started with creating content. Our Yulio platform is compatible with rendered images from most 3D modeling software and CAD platforms as well as 360-degree photos, giving you the flexibility and option for capturing spaces that may or may not currently exist. However, if you’re not an expert renderer but would still like to produce near-photorealistic renders, you can consider investing in a cloud-based rendering platform.
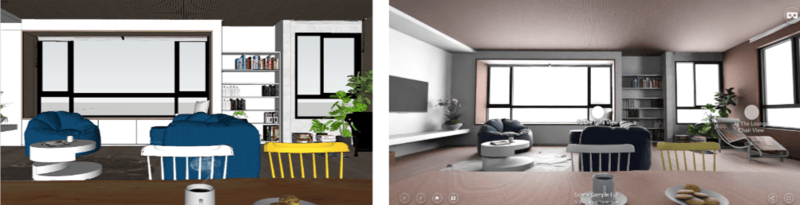
Here's project that was rendered with the native SketchUp renderer (left) compared to our Yulio Jump for SketchUp platform (right)
Unlike the traditional way of rendering, using a cloud rendering platform significantly speeds up the time to render, helping you quickly produce fantastic images for your next client presentation. On top of that, since the rendering process takes place in the cloud rather than on your local computer, your computer is completely free to continue doing other tasks or get started on the next project. So if you’re looking for an inexpensive way to quickly render your models with depth and dimension, consider looking into investing in a cloud renderer service
Yulio Jump is our cloud-based rendering platform, giving users access to unlimited cloud renderings for SketchUp and CET Designer users. You can click here to learn more about Yulio Jump for SketchUp and Yulio Jump for CET.
Step 5: Download the CAD plugin you need
Yulio’s software is easy to integrate into existing workflows. We built Yulio from the ground up to fit in with your existing design workflow, so that getting started with virtual reality would fit seamlessly into your design flow. Our plugins will help speed up your workflows by combining a few steps you would take to self-create your VR-compatible scenes. With just one click, the Yulio plugin will both generate your cubemaps within your CAD software as well as stitch the faces together. Simply prepare your scene, lights, and cameras, and start the plugin. Or if you don’t use one of these CAD programs, you can simply upload your CAD files as a PNG or JPEG. file and still get the same great VR experience.

You can start seeing your CAD designs in VR fast and simply using one of our many plugins or file compatibility options.
You can click here to download the plugin you need.
Step 6: Watch introductory tutorial videos
We designed our software to be as intuitive as possible; however, we have created a variety of resources to help guide you through Yulio’s many great features and functions that will help you create stunning presentations.
Our YouTube channel has quick summary videos, longer walkthrough demos, and technical guidance that will lead you to success while using Yulio!
You don’t have to watch all of them - only as many as you think you need to get you on your feet, but we have an abundance of resources that will get you off the ground from the get-go!
Step 7: Explore the Yulio Learning Portal
We recently just launched the Yulio Learning Portal which is a free resource for all Yulio account holders. This portal has several self-paced video learning courses that you can take whenever you would like. Can’t finish it all in one sitting? No worries, the portal will track your progress in whatever course you are taking, and you can always come back when you have the time.
We have a beginner’s course which is great for first-time Yulio users and offers an in-depth look at the platform and all the features that the platform offers. This is a great place to refresh yourself as well if you ever need to explore a feature further. We also offer a quick start guide for those looking to get their Yulio projects off the ground right away.

There are also advanced courses that focus on some of the more technical features of Yulio as well as a course focused on Yulio Jump that will guide you on how to use our cloud rendering software to create your projects.
Step 8: Upload to Yulio and add dimension to your VR experience
You may have gone over this in our onboarding when you first logged on after signing up, but this time you can take something you already own – a CAD model you already have perhaps and drop it into Yulio. You don’t need to start with anything fancy to get a glimpse of our software. If you used one of our plugins, it should have uploaded your rendering for you, however, if you’re manually uploading your design files, then it could take a couple of minutes depending on the size of the file you’re trying to upload.
Yulio has a bunch of amazing features that can truly elevate your VR experience. You could start by recording a simple voice file for audio hotspots, then and you can connect your scenes using navigational hotspots. After that, you can create a birds-eye view using our floor plan navigation, add text hotspots, and even play around with some of our expert VR design tips here.
It doesn’t take long to bring your VR design to another level, and every detail, when you’re immersed in the scene, stands out to your user. Now that you have your awesome VR scene ready to go, now you can use some of the other features Yulio has to offer such as Collaborate for cross-country design collaboration with your peers and Custom Branding to make your assets all your own.
Step 9: View it!
This could be either downloading the Yulio Viewer app onto your smartphone, or onto your Oculus/Meta Quest, but once you have the app downloaded, all you need to do is connect your device to your account and view away!
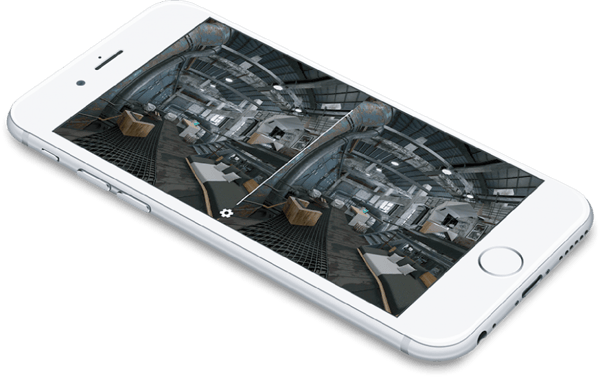
By downloading the Yulio app onto your device, anyone can have a VR portfolio on-the-go
Your VR projects will appear in your ‘lobby’ on your app, which allows you to have quick access when you’re on-the-go with clients, or just to have as a portfolio in your pocket.
Step 10: Share it!
And just like that - here we are. You’ve now created your first VR project and you’re ready to share it with your clients, colleagues, and friends alike. See? We’ve made VR easy, and that’s what Yulio stands by - Simple, mobile, and affordable VR that is made for the regular Joe to use.
Anyone can be the creator of stunning VR presentations and all you need is a half of a day for getting started with VR. Try VR for a month on us by signing up for our free full-feature account, or kickstart your VR journey by taking our 5-day email course to start learning about VR for your practice and everything you need to consider. Start learning here!
Updated: June 30, 2022

.jpg?width=245&height=150&name=active-adult-beautiful-1799244%20(1).jpg)